Creating a authentic Splatoon cosplay wig requires moving beyond traditional synthetic hair styling. Inklings and Octolings do not have standard strands—their iconic "hair" consists of slick, liquid-filled tentacles that curve outward and defy gravity. On community platforms like TikTok under #splatooncosplay, creators frequently offer advice to cosplayers struggling with heavy, sagging tentacles, proving that how to make a Splatoon tentacle wig has evolved into its own specialized styling discipline.
This tutorial breaks down the process into a repeatable 3-step pipeline using lightweight foam cores, vinyl skins, and internal wire mounting.
Required Tools & Materials Checklist
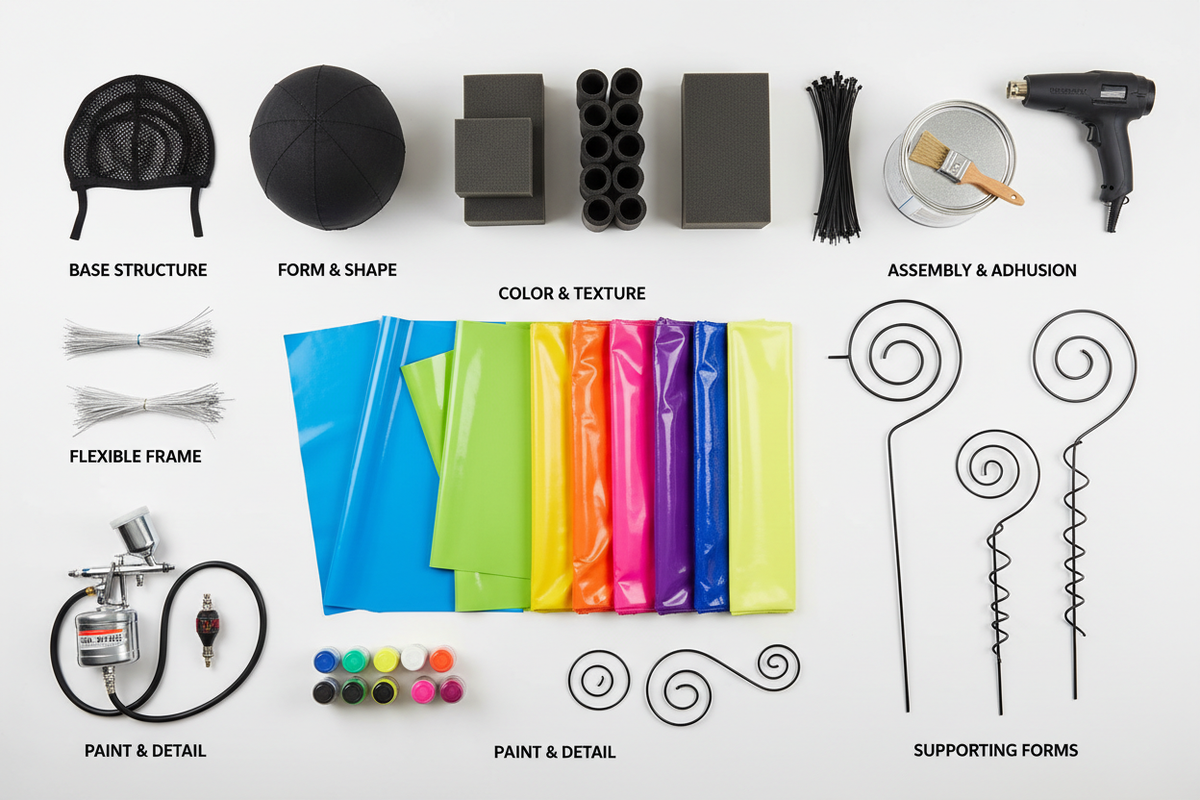
Before starting your Splatoon tentacle wig tutorial, gather the following structural and finishing supplies:
-
Base Cap: High-friction mesh wig cap or buckram helmet base.
-
Core Materials: High-density upholstery foam (2-inch thickness) or EVA foam tubes.
-
Support Wire: 12-gauge aluminum armature wire or steel heavy-duty craft wire.
-
Outer Skin / Cover: Four-way stretch vinyl, wet-look spandex, or smooth synthetic wig fiber sheets.
-
Mounting Hardware: Heavy-duty zip ties, contact cement, and hot glue.
-
Styling Tools: Heat gun, airbrush kit (for gradient suction cup details), and structured wig styling supports & wire frames.
Step 1: Crafting the Internal Foam Core & Wire Armature
Unlike standard wigs that hang naturally, a floating cosplay wig structure must support significant forward and lateral overhang without collapsing onto your face.
               [ SPLATTERN TENTACLE INTERNAL ANATOMY ]

  Wig Cap Base   ──► [ Buckram/Steel Baseplate ]
                                 │
  Heavy Wire     ──► [ 12-Gauge Armature Wire ] ── (Provides curve & bounce)
                                 │
  Foam Fill      ──► [ Carved Upholstery Foam ] ── (Gives plump, rubbery volume)
                                 │
  Outer Skin     ──► [ Wet-Look Vinyl / Spandex ] ── (Mimics ink sheen)
-
Carve the Tentacle Profile: Cut your upholstery foam into tapered sausage or wedge shapes matching your character's Inkling hairstyle. Hollow out the central spine slightly to reduce overall weight.
-
Insert the Armature Wire: Run a continuous piece of 12-gauge aluminum wire down the center of each foam tentacle. Leave 4–6 inches of exposed wire at the top root—this wire anchor will attach directly to your wig base.
-
Shape the Gravity-Defying Curve: Bend the wire to create the outward "floating" flare characteristic of Splatoon character designs.
Community Insight: The hybrid nature of Inkling characters—combining human features with smooth, mascot-like silhouettes—shares structural methods with fursuit crafting techniques in cosplay. Borrowing lightweight foam-carving tactics from fursuit makers keeps oversized tentacle wigs under 1.5 lbs, preventing neck strain during long convention days like Holiday Matsuri.
Step 2: Fabricating and Fitting the Smooth Tentacle Skins
To capture the wet, glossy look of Inkling hair, you need a seamless cover over your foam core.
-
Patterning the Cover: Wrap your carved foam tentacle in plastic wrap, then cover it in painter's tape. Draw seam lines down the back and around the suction cups. Slit the tape casing open and lay it flat to create your sewing pattern.
-
Stretching and Sewing: Transfer the pattern onto 4-way stretch wet-look vinyl or shiny spandex. Sew the pieces right-sides-together, leaving the root end open.
-
Skinning the Core: Turn the fabric tube right-side-out and slide it over your wire-and-foam core like a sleeve. Pull tight to eliminate wrinkles, securing the bottom seam with contact cement.
-
Airbrushing Suction Cups: Glue pre-shaped foam rings onto the underside of the tentacles to represent suction cups. Use an airbrush with acrylic fabric paint to add the signature gradient splatter effect.
Step 3: Securing the "Floating" Structure to the Wig Base
The most common failure point when learning how to style Inkling tentacle hair is securing the heavy tentacles to a soft mesh wig cap. Standard hairpins will slide off immediately.
-
Build a Rigid Foundation: Stitch a piece of buckram, thin thermoplastic (Worbla), or a fitted plastic headband inside the top crown of your base wig cap.
-
Anchor the Armature: Pass the exposed 4–6 inches of armature wire from each tentacle through the top of the wig cap and wrap them tightly around the internal rigid plate. Secure the wire connection using heavy-duty zip ties and contact cement.
-
Blend the Bangs and Roots: Use short synthetic wig wefts to cover the attachment roots at the hairline, styling smooth swooping bangs with hairspritz and a heat gun to hide all structural wire joints.
-
Reinforce with Interior Supports: For large front tentacles, install structured wig styling supports & wire frames under the cap to distribute the forward pull across your head evenly.
Troubleshooting & Common Pitfalls
| Problem | Root Cause | Immediate Fix |
| Tentacles droop or flop forward | Wire gauge is too thin or anchor plate is too flexible. | Thread a secondary 10-gauge wire through the root or upgrade to a rigid buckram crown plate. |
| Wig slides off forehead | Front-heavy balance point pulling the wig back. | Add an adjustable elastic chin strap or install internal wig clips along the front hairline. |
| Wrinkles along tentacle curves | Fabric cover lacks 4-way stretch or was cut too loose. | Re-sew the seam tighter by 5% to force the stretch fabric to pull firmly against the foam core. |
| Glossy finish peeling off | Incorrect paint used over vinyl surfaces. | Seal airbrushed gradients with a flexible liquid vinyl sealer rather than standard clear coat. |
Summary & Next Steps
Mastering tentacle wig styling unlocks a new tier of cosplay craftsmanship. By building a rigid internal core, skinning with stretch materials, and anchoring directly to reinforced cap structures, you can recreate any Inkling or Octoling hairstyle with complete convention-ready stability.
Next Steps for Your Build:
-
Explore our professional structured wig styling supports & wire frames to ensure your heavy prop hair stays secure all day.
-
Check out our cross-over guide on fursuit techniques in anime cosplay for advanced foam-carving tips and lightweight headpiece balancing.



コメントを書く
このサイトはhCaptchaによって保護されており、hCaptchaプライバシーポリシーおよび利用規約が適用されます。