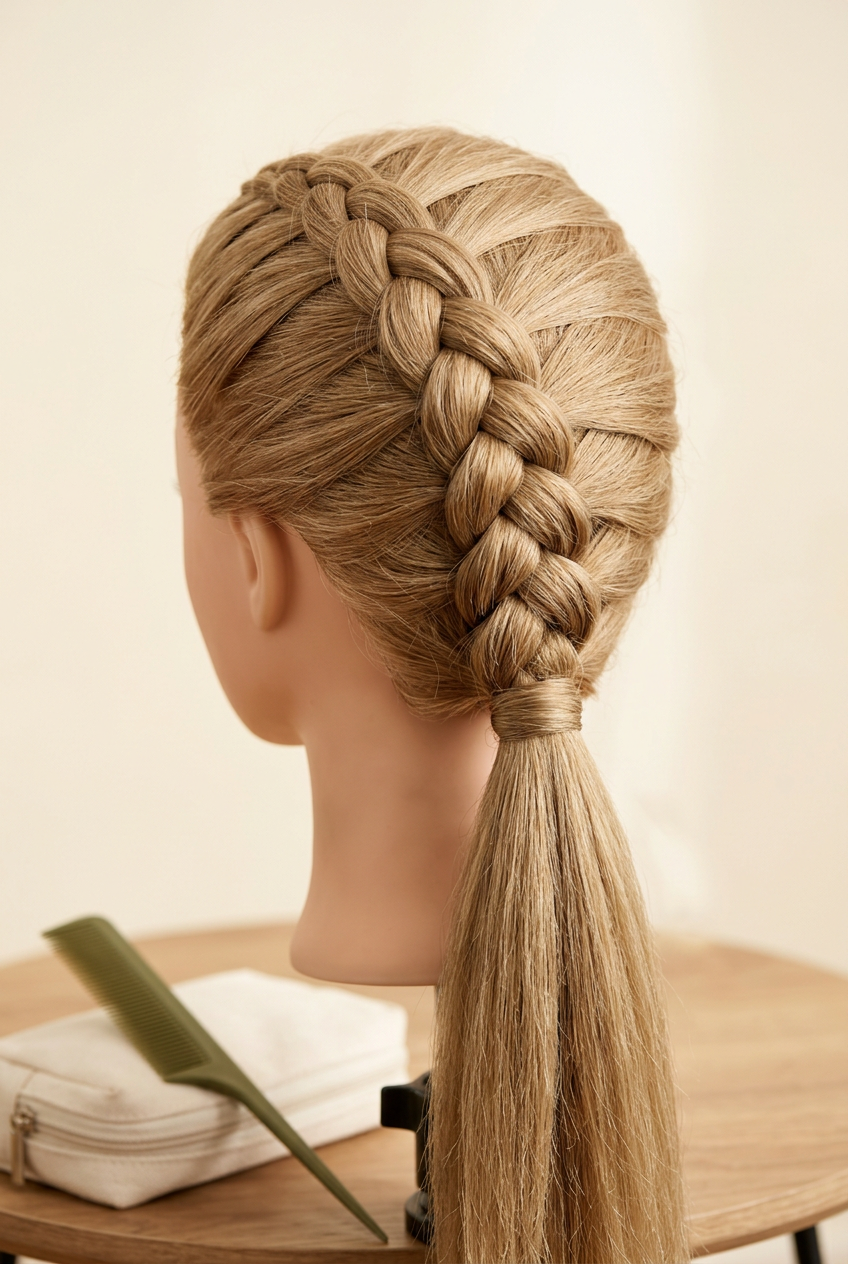
Introduction: Bringing Post-Apocalyptic Hairstyles to Daily Fashion
In The Last of Us Part II, Abby Anderson’s tightly woven Dutch braid is one of her most defining visual anchors. Designed by Naughty Dog to remain practical during intense hand-to-hand combat, her hairstyle has transcended screen use to become a viral trend on TikTok and Instagram Reels. Creators like @taylorsfirefly generated thousands of likes and hundreds of comments with quick, practical Abby Anderson Dutch braid tutorial posts, showcasing both convention-ready styling and wearing the look to school or work as casual "everyday cosplay."
Academic research in trichology and cosmetic science confirms that Dutch braids (reverse French braids) distribute tensile force evenly across the scalp, reducing structural fatigue and preventing loose flyaways during prolonged physical activity (Dawber, Cosmetic Dermatology for Skin and Hair, CRC Press). Whether you are styling natural hair or a heat-resistant synthetic wig, mastering this underhand braiding technique delivers a screen-accurate, durable hold.
Before starting your styling session, assemble these essential hair tools and products:
-
Preparation Supplies: Wide-tooth detangling comb, tail comb (for precise parting), alligator sectioning clips, and a water spray bottle.
-
Styling & Hold Products: Matte texturizing sea-salt spray, light-hold styling pomade or wax stick, clear silicone elastic bands, and matte finishing hairspray.
-
Wig Styling Essentials (If Applicable): Canvas wig block, T-pins, steamer, and high-quality cosplay wigs and hair styling accessories.
Step 1: Prepping Natural Hair or Synthetic Wigs for Structural Hold
Creating a tight, long-lasting Dutch braid requires creating surface friction on hair fibers so the weave does not slip during convention walks or daily routines.
                     +---------------------------------------+
                     | DUTCH BRAID PREPARATION PIPELINE      |
                     +---------------------------------------+
                                         |
               +-------------------------+-------------------------+
               v                                                   v
  [ Option A: Natural Human Hair ]                       [ Option B: Synthetic Cosplay Wig ]
  - Lightly mist with water / sea-salt spray             - Mount wig firmly to canvas block with T-pins
  - Apply matte pomade along crown and hairline          - Steam fibers straight to clear tangles
  - Brush backwards from forehead without middle part     - Lightly crimp roots using a mini crimping iron
               |                                                   |
               +-------------------------+-------------------------+
                                         v
                     +---------------------------------------+
                     | Ready for 3-Strand Underhand Weave    |
                     +---------------------------------------+
-
Prepping Natural Hair: Avoid freshly washed, silky hair. Spray dry hair with matte texturizing sea-salt spray to add grip. Work a dime-sized amount of styling pomade through your roots to control baby hairs along the forehead and temples.
-
Prepping a Synthetic Wig: Secure a heat-resistant lace front wig ($180^\circ\text{C}$ / $350^\circ\text{F}$ rated) to a canvas block using T-pins. Brush out all tangles starting from the tips up to the roots. Use a mini crimping iron on low heat near the root cap to build internal volume and grip before weaving.
-
Establishing the Hairline Direction: Comb all hair directly back from the forehead without creating a center or side part, mimicking Abby’s slicked, tactical crown gathering.
Step 2: Executing the Dutch Braid Technique (Underhand Weave)
Unlike a traditional French braid where outer strands cross over the center strand, an Abby cosplay hairstyle utilizes an underhand weave (crossing outer strands under the center strand) to create a raised, 3D braid structure that rests on top of the scalp.
                  Top Crown Section: Divide into 3 Equal Strands (Left, Center, Right)
                                           |
    [ Left Strand ] <--- Cross UNDER ---> [ Center Strand ] <--- Cross UNDER ---> [ Right Strand ]
                                           |
              Incorporate new hair from hairline/sides into outer strands as you work down
                                           |
                  Continue underhand weave down nape of neck to full hair length
-
Gathers the Crown Anchor: Gather a $2\text{-inch}$ section of hair from the top center of your forehead. Divide this section into three equal strands: Left, Center, and Right.
-
Begin the First Underhand Weave:
-
Cross the Right strand underneath the Center strand (it now becomes the new Center).
-
Cross the Left strand underneath the new Center strand (it becomes the new Center).
-
-
Incorporate Hair as You Progress Downward: Before crossing the next outer strand under, scoop up a small horizontal sub-section of loose hair from the side of your head and merge it into that outer strand.
-
Maintain High Tension along the Scalp: Keep your hands close to the scalp as you move down toward the nape of the neck. Pull each weave firmly to ensure the braid stays tight against the head without sagging.
Step 3: Securing, Pancaking for Volume, & Setting the Look
Once the braid reaches the base of the neck, continue a standard three-strand underhand braid down the remaining length of your hair or wig extensions.
-
Fastening the Tail: Secure the end of the braid using a small, clear or hair-color-matched silicone elastic band. Wrap a small $0.5\text{-inch}$ strand of hair around the elastic band to hide it, tucking the end into the elastic with a bobby pin for a seamless finish.
-
Light "Pancaking" for Character Volume: Abby’s braid is thick and athletic. To recreate her full silhouette, gently tug the outer edges of each braid weave outward starting from the nape of the neck up to the crown. This technique ("pancaking") widens the braid width by up to $50\%$ without loosening the core weave.
-
Setting the Style: Spray the finished braid with a matte, medium-hold hairspray. For a post-apocalyptic, weathered effect on convention days, stipple a tiny amount of water-resistant brown cosmetic powder along the hair parting lines to mimic dust and grime.
Troubleshooting Common Braid Hazards & Casual Wear Tips
-
Braid Loosens or sags at the Nape of the Neck: This happens when you tilt your head down while braiding the back. Keep your chin held level or tilted slightly up while crossing strands near the base of the neck to maintain tight tension.
-
Short Layers Poke Out Along the Weave: If short hair layers stick out through the weave, smooth them down using a wax stick or clear eyebrow gel brushed in the direction of the braid.
-
Styling for Everyday Wear: Integrating everyday cosplay hairstyles into daily fashion offers a subtle nod to your favorite character. Pair the braid with a denim jacket or casual hoodie for a clean, athletic look without needing a full costume.
Conclusion & Essential Hair Accessories Directory
Mastering Abby Anderson's Dutch braid adds a versatile, high-impact hairstyle to your costuming toolkit. By prepping hair with texturizing sea-salt spray, maintaining tight underhand weaving tension, and pancaking the braid for volume, you can achieve a screen-accurate look for conventions or daily wear. Explore our store collection for cosplay wigs and hair styling accessories to stock your styling kit today!


Laisser un commentaire
Ce site est protégé par hCaptcha, et la Politique de confidentialité et les Conditions de service de hCaptcha s’appliquent.