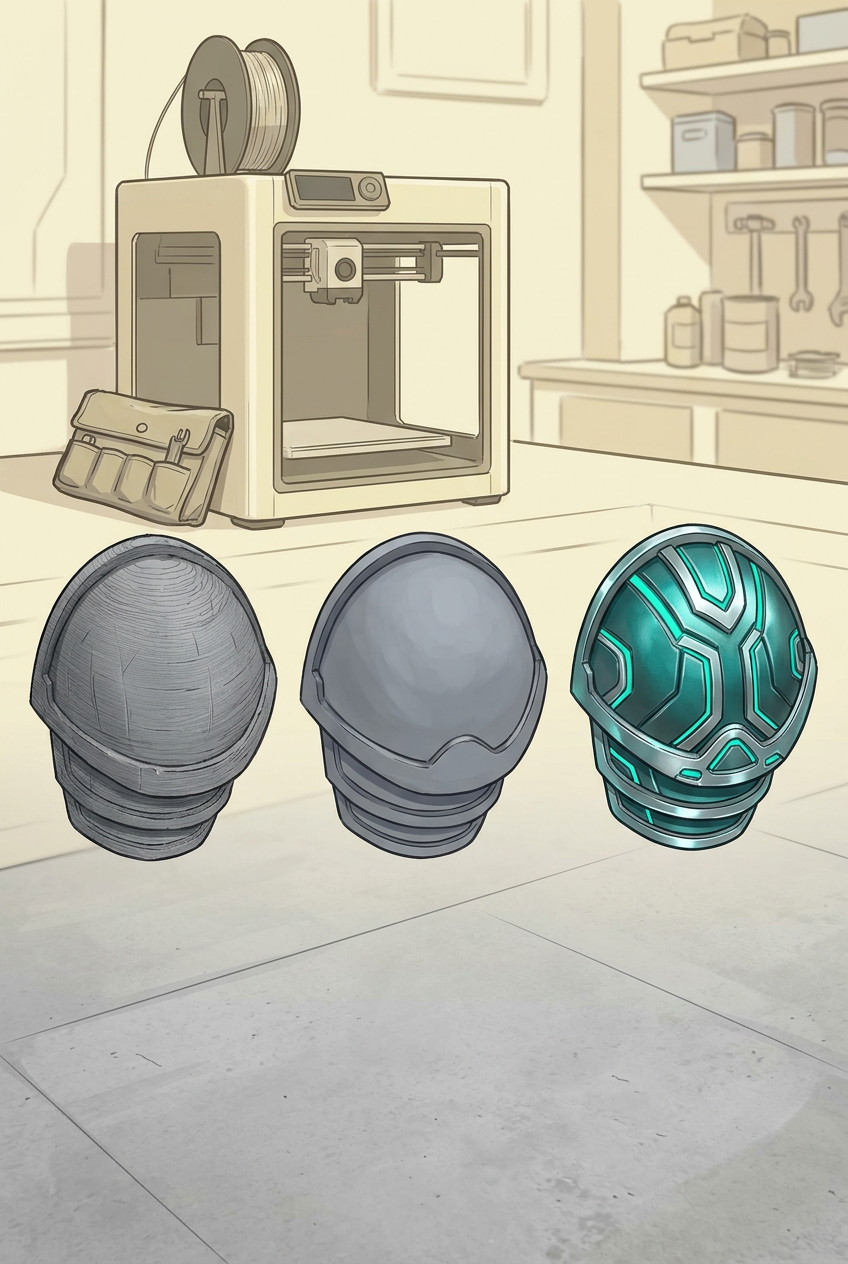
Introduction: Preparing for the Upcoming Convention Season
With the frantic rush of Halloween week behind us, now is the ideal time to shift focus toward long-term fabrication projects for next year's convention circuit. Whether you are crafting intricate headpieces (such as a Scarlet Witch tiara) or modular 3D printed cosplay armor, additive manufacturing has revolutionized prop-making.
Material science literature emphasizes that understanding polymer behavior and mechanical finishing is essential for turning raw plastic into professional-grade props (Ashby, Materials Selection in Mechanical Design, Butterworth-Heinemann). According to beginner manufacturing guides from suppliers like 3DJake, Polylactic Acid (PLA) remains the gold standard for 3D printed cosplay props for beginners due to its user-friendly printability and excellent detail reproduction.
Before firing up your printer for your next big build, assemble this essential preparation toolkit:
-
Hardware & Filaments: FDM 3D printer, high-grade PLA filament, and digital calipers.
-
Finishing & Sanding Supplies: Sandpaper grits (120, 240, 400, 800), automotive filler primer, and sanding sponges.
-
Safety Gear: NIOSH-certified dust mask/respirator, safety goggles, and nitrile gloves.
-
Specialized Sourcing: 3D printing filament and cosplay prop finishing supplies.
Step 1: Slicing Optimization & High-Detail PLA Printing
Direct Answer: Best 3D printing settings for detailed cosplay props involve balancing structural durability with surface resolution by utilizing a standard 0.2mm layer height for structural bases or a finer 0.12mm height for intricate pieces like crowns and tiaras.
                     +---------------------------------------+
                     | 3D PRINTING SLICING & PREP PIPELINE   |
                     +---------------------------------------+
                                         |
               +-------------------------+-------------------------+
               v                                                   v
  [ 1. Slicing & Layer Configuration ]                   [ 2. Infill & Wall Settings ]
  - Set layer height (0.12mm - 0.2mm)                     - Use 15% - 25% cubic or grid infill
  - Orient flat surfaces against build plate             - Set 3 to 4 perimeter walls for strength
               |                                                   |
               +-------------------------+-------------------------+
                                         v
                     +---------------------------------------+
                     | 3. Print Execution & Inspection       |
                     - Monitor first layer adhesion          |
                     - Check dimensional accuracy            |
                     +---------------------------------------+
Optimizing Model Slicing Parameters
-
Model Retrieval & Orientation: Download tested models from repositories like MakerWorld (e.g., detailed headpieces or armor plates). Orient flat surfaces flush against the print bed to minimize overhangs and support scarring.
-
Layer Height Selection: For large armor pieces, a 0.2mm layer height saves print time (averaging 6 to 8 hours depending on scale) while maintaining clean structural lines. For fine cosmetic details (like gemstone settings or filigree), drop down to 0.12mm to reduce visible layer lines.
-
Walls and Infill: Set your slicer to 3 or 4 perimeter walls (perimeters) for robust impact resistance, paired with a 15% to 25% cubic or gyroid infill.
Step 2: Safe Sanding & Particulate Protection Protocols
Direct Answer: How to safely sand 3D printed cosplay props with proper ventilation requires wearing a certified dust mask and safety goggles, working in a well-ventilated area, and utilizing wet-sanding techniques to eliminate airborne plastic micro-particulates.
Occupational Safety and Particulate Control
Mechanical sanding of thermoplastic polymers generates fine dust particles that can irritate respiratory tracts and eyes. According to occupational health guidelines established by NIOSH (National Institute for Occupational Safety and Health) regarding particulate inhalation, mechanical grinding or sanding of plastics mandates personal protective equipment (PPE).
                     +---------------------------------------+
                     | RECOMMENDED SANDING GRIT PROGRESSION  |
                     +---------------------------------------+
                     |                                       |
                     |  [ 1. Coarse Grit (120 - 220) ]       |
                     |  - Knock down major layer lines       |
                     |                                       |
                     |  [ 2. Medium Grit (320 - 400) ]       |
                     |  - Smooth primer coats                |
                     |                                       |
                     |  [ 3. Fine Grit (600 - 800) ]         |
                     |  - Final polish before metallic paint |
                     |                                       |
                     +---------------------------------------+
-
Equip Proper PPE: Always wear safety goggles and an N95 or half-mask respirator before touching sandpaper to plastic.
-
Execute Grit Progression: Start with coarse 120-grit sandpaper to knock down prominent layer ridges. Progress sequentially to 240-grit, 400-grit, and finish with 800-grit wet-sanding paper.
-
Wet Sanding Advantages: Dip your sandpaper in water mixed with a drop of dish soap. Wet sanding traps plastic dust particles in liquid, preventing them from floating into the air and clogging your sandpaper.
Step 3: Layer Filling, Priming, and Metallic Painting
Direct Answer: How to sand and paint PLA cosplay armor smoothly relies on alternating between spray coats of automotive filler primer and fine-grit sanding until all microscopic layer lines disappear completely.
The Professional Finishing Cycle
-
Apply Filler Primer: Spray an even, light coat of automotive grey filler primer over your sanded print. Filler primer contains micro-particles that bridge and fill remaining 3D printing valleys.
-
The "Sand-Prime-Sand" Iteration: Inspect the primed surface under direct light. You will likely still see faint layer lines. Sand down the primer until the underlying plastic begins to peek through, wipe clean, and apply a second coat of primer. Repeat this cycle 2 to 3 times for a glass-smooth finish.
-
Base Coat & Metallic Weathering: Apply your base color (such as metallic gunmetal or vibrant red). For armor, add depth by applying a dark acrylic wash into recessed crevices and dry-brushing silver along raised edges to simulate battle wear.
Troubleshooting Common Mistakes & Beginner Pitfalls
-
Mistake 1: Applying Paint Too Thickly. Novices often try to cover unprimed plastic with heavy coats of hobby paint, causing pooling, drips, and obscured details. Always apply multiple thin, feathered coats.
-
Mistake 2: Skipping Primer Iterations. Stopping after a single coat of primer guarantees that layer lines will show through your final metallic paint job under convention lighting. Patience during the priming phase defines professional results.
-
Mistake 3: Sanding Without Respiratory Protection. Ignoring dust safety leads to inhaling micro-plastics. Always prioritize personal safety by wearing a respirator and working outdoors or in a ventilated garage.
Conclusion & Next Steps for DIY Builds
Mastering the art of how to make 3D printed cosplay props from start to finish transforms digital blueprints into tactile, convention-ready masterpieces. By optimizing slicing parameters, strictly adhering to dust safety protocols, and mastering the filler primer cycle, your upcoming builds will achieve breathtaking accuracy. Explore our comprehensive collection of 3D printing filament and cosplay prop finishing supplies to stock your workshop today!



Laisser un commentaire
Ce site est protégé par hCaptcha, et la Politique de confidentialité et les Conditions de service de hCaptcha s’appliquent.