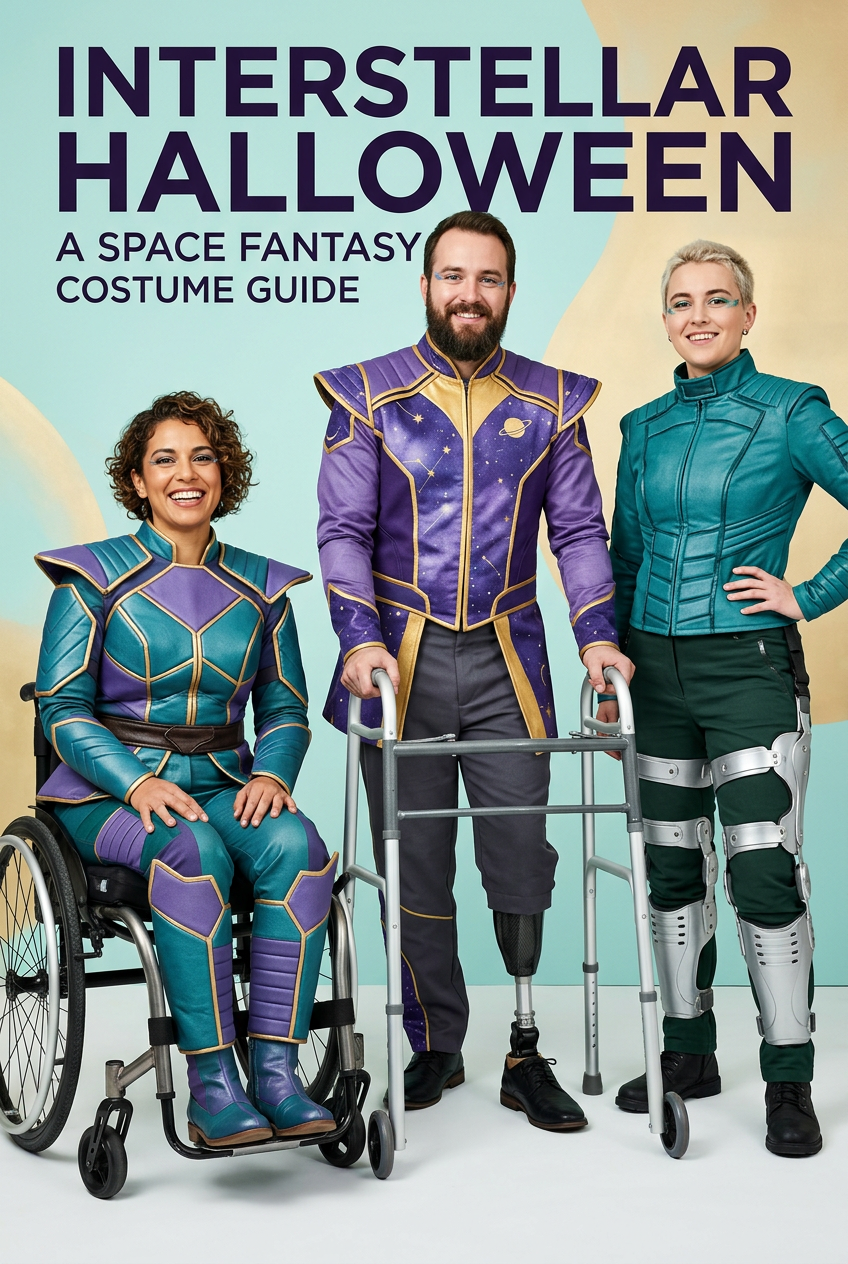
Introduction: Inclusive Cosplay & Adaptive Costuming Essentials
Halloween and cosplay events should be accessible to every builder, costumer, and performer. For individuals using wheelchairs, walkers, rollators, or leg braces (such as AFOs or KAFOs), traditional off-the-rack outfits can present mobility barriers, fitting issues, or safety hazards. However, rather than trying to hide or work around adaptive equipment, modern costuming approaches treat mobility aids as integral components of the design.
Guidelines published by pediatric physical therapy institutions—including Westside Children's Therapy—highlight that adaptive builds should enhance inclusion while preserving safety, independence, and comfort. Online platforms like TikTok feature viral community projects under topics like #wheelchaircostume and #wheelchaircar, where creators build rolling Tiki huts, police cars, spaceship cockpits, and enchanted carriages.
Academic literature in occupational ergonomics and biomechanics emphasizes that adaptive apparel must prevent physical constriction, maintain thermal regulation, and keep clear of mechanical pinch points (Amasay et al., International Journal of Industrial Ergonomics; Cole et al., Ophthalmic and Physiological Optics).
Before beginning your adaptive build, assemble these essential safety materials and workshop supplies:
-
Structural Fabrication Materials: Lightweight corrugated cardboard, foam core boards, $0.5\text{-inch}$ PVC piping, and pool noodles.
-
Fasteners & Quick-Release Straps: Heavy-duty Velcro (hook-and-loop) strips, plastic zip ties, fabric ties, and soft magnetic snap closures.
-
Safety & Illumination Supplies: Battery-operated LED clip lights, reflective tape strips, fabric shears, and adaptive Halloween costumes and accessible costume accessories.
Step 1: Transforming Wheelchairs into Integrated Character Vehicles & Themed Covers
A wheelchair Halloween costume transforms a manual or power chair into an immersive vehicle, throne, or scene.
                     +---------------------------------------+
                     | WHEELCHAIR COVER INTEGRATION FLOW     |
                     +---------------------------------------+
                                         |
               +-------------------------+-------------------------+
               v                                                   v
  [ 1. Measure Clearance & Framework ]                   [ 2. Fabricate Lightweight Shell ]
  - Measure wheel clearance & door width                 - Cut side panels from foam board/cardboard
  - Keep hand rims & joystick completely clear           - Connect panels via plastic PVC pipe core
               |                                                   |
               +-------------------------+-------------------------+
                                         v
                     +---------------------------------------+
                     | 3. Quick-Release Attachment           |
                     - Fasten to chair frame using Velcro    |
                     - Ensure 1-second emergency removal     |
                     +---------------------------------------+
-
Map Wheel Clearance and Control Interfaces: Measure the total width of the wheelchair, ensuring side panels do not rub against the tires or block power joysticks, push handles, or brake levers.
-
Construct a Lightweight Structural Skeleton: Build side panels out of corrugated plastic or foam core board. Connect left and right panels across the front using lightweight $0.5\text{-inch}$ PVC pipes or wooden dowels.
-
Attach Using Non-Damaging Quick-Release Straps: Secure side panels directly to the metal chair frame using heavy-duty Velcro strips or fabric ties. Never use permanent adhesives or duct tape directly on mechanical chair components. Ensure the entire structure can be removed in under five seconds during transit or emergencies.
-
Maintain Doorway and Ramp Clearance: Ensure the expanded width of the decorated chair does not exceed $32\text{ inches}$ ($81\text{ cm}$), allowing the user to navigate standard doorways, ramps, and elevators easily.
Step 2: Decorating Walkers & Rollators Without Compromising Stability or Braking
When customizing walker costume ideas for Halloween or conventions, decorations must never compromise structural balance or braking mechanics.
                  +------------------------------------------------+
                  |  WALKER DECORATION SAFETY BOUNDARIES           |
                  +------------------------------------------------+
                  |                                                |
                  |     [ TOP FRAME / HANDLEBAR ZONE ]             |
                  |     - Light fabric wraps & signs               |
                  |     - NO obstruction of hand grips/brakes      |
                  |                                                |
                  |     [ MIDDLE STRUT ZONE ]                      |
                  |     - Lightweight foam/cardboard panels        |
                  |     - Streamers & themed decals                |
                  |                                                |
                  |     [ BOTTOM WHEEL & FOOT CLEARANCE ZONE ]     |
                  |     - STRICT 4-INCH GROUND CLEARANCE           |
                  |     - NO low-hanging tassels or ribbons        |
                  |                                                |
                  +------------------------------------------------+
-
Keep Hand Grips and Brake Levers Clear: Never wrap fabrics, garlands, or foam props over rubber hand grips or cable brake levers. The user must maintain an unhindered grip at all times.
-
Maintain Ground Clearance Above Wheels: Ensure all decorative fabric panels, streamers, or cardboard facades end at least $4\text{ inches}$ ($10\text{ cm}$) above the floor. Low-hanging ribbons can catch in castor wheels or under the user's feet, creating serious tripping hazards.
-
Balance Weight Distribution: Keep front-mounted decorations lightweight (under $2\text{ lbs}$) to prevent the walker from tipping forward when pushed.
Step 3: Modifying Costumes for Leg Braces (AFOs/KAFOs) & Medical Access Points
Costumes designed for individuals wearing Ankle-Foot Orthoses (AFOs), Knee-Ankle-Foot Orthoses (KAFOs), or using medical tubing require targeted garment modifications.
| Equipment Need | Modification Strategy | Recommended Hardware / Fabric |
| Leg Braces (AFOs / KAFOs) | Expand lower pant legs using inseam Velcro slits or wider leg openings so trousers slide easily over rigid braces. | Hook-and-loop seam tape, wide-leg utility trousers, or stretch jersey fabric. |
| Medical Access Points (G-Tubes / Lines) | Install hidden pass-through slits with flap covers along the garment's midsection or side seams. | Magnetic fabric snaps or soft flat zippers with pull tabs. |
| Sensory Sensitivity | Remove internal tags, cover exposed seams, and choose tagless, ultra-soft base layers to prevent skin irritation. | Flatlock stitching, seamless cotton base tights, or tagless under-jackets. |
                     +---------------------------------------+
                     | INSEAM VELCRO MODIFICATION PIPELINE   |
                     +---------------------------------------+
                                         |
  [ Step 1 ] ----> Slit trouser inseam from cuff up to mid-calf
                                         |
  [ Step 2 ] ----> Stitch hook-and-loop Velcro strips along slit edges
                                         |
  [ Step 3 ] ----> Open pant leg flat, place over leg brace, and press closed
-
Modifying Trouser Inseams: Cut open the inner seam of costume pants from the cuff up to the mid-calf. Sew matching Velcro strips along the seam edges. This allows the user to put on trousers with their braces already locked in place.
-
Swapping Zippers for Magnetic Snaps: Replace tight metal zippers or small buttons with magnetic fabric closures or wide-tab hook-and-loop strips to make dressing easier for users with limited fine motor dexterity.
Troubleshooting Mobility Hazards & Pre-Halloween Motion Testing
-
Wheelchair Tires Rubbing Against Cardboard Panels: If tires rub against side panels during turns, install flexible PVC pipe spacers to push the panels $1\text{ to }2\text{ inches}$ outward, creating clear wheel clearance.
-
Fabrics Catching in Castor Wheels: Secure loose skirt hem lines or cape tails using interior elastic bands or leg ties to keep fabrics tucked away from rolling wheels.
-
Conducting a Full "Practice Run": Perform a complete trial run at least three days before Halloween night or convention day. Have the user walk, roll, turn, sit, and stand in the complete outfit to confirm full mobility and comfort.
Conclusion & Accessible Sourcing Directory
Adapting costumes for wheelchairs, walkers, and braces transforms functional equipment into high-impact, creative expressions. By keeping wheel clearances clear, securing quick-release attachments, widening trouser seams for braces, and conducting pre-event motion tests, costumers can enjoy a safe, accessible, and unforgettable Halloween. Explore our specialized catalog for adaptive Halloween costumes and accessible costume accessories to start your accessible project today!

Dejar un comentario
Este sitio está protegido por hCaptcha y se aplican la Política de privacidad de hCaptcha y los Términos del servicio.