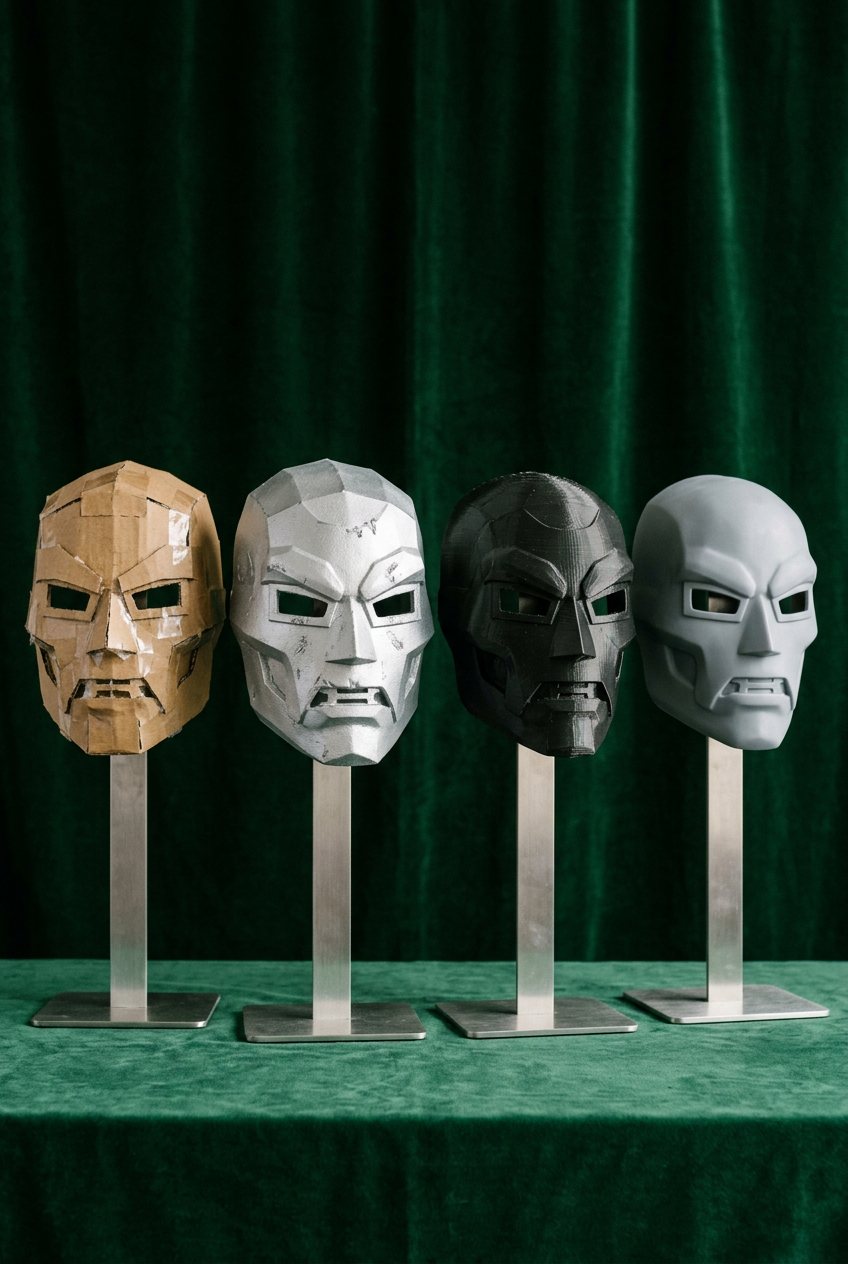
Introduction & Fabrication Timeline Overview
The commercial and fan fabrication lifecycle for blockbuster villains follows a rapid pipeline—from San Diego Comic-Con (SDCC) and D23 suit unveils in July to Halloween retail drops in October and global film premieres in December. Following the announcement of Robert Downey Jr. taking on the mantle of Victor von Doom for Avengers: Doomsday, prop makers, digital sculptors, and retail manufacturers launched simultaneous production pipelines across multiple skill levels.
Sociological costume studies and maker culture literature demonstrate that fan subcultures organize fabrication methods into distinct "budget ladders" to accommodate varying income levels, skill sets, and preparation timelines (Entwistle, The Fashioned Body; Jenkins, Textual Poachers). Whether building a how to make a Doctor Doom cosplay on a budget speed-craft for a local screening or engineering screen-accurate plate mail, understanding the trade-offs between cardboard, high-density foam, resin 3D prints, and off-the-shelf suits ensures a successful build.
This guide evaluates the four primary Doctor Doom fabrication routes across cost, build speed, durability, and visual fidelity.
Quick Comparison Table: Doctor Doom Build Tiers
| Fabrication Route | Estimated Cost & Time | Material & Tooling Needs | Best Suited For |
| 1. Cardboard & Pepakura | $15 – $50 / 1–3 Days | Cardboard, craft paper, hot glue, metallic spray paint | Beginners, school events & emergency speed-builds |
| 2. EVA Foam Armor | $50 – $150 / 1–2 Weeks | 2mm–10mm EVA foam, heat gun, contact cement, rubber primer | Mid-tier crafters seeking a balance of weight & durability |
| 3. High-Precision 3D Printing | $150 – $400+ / 3–6 Weeks | FDM/Resin printer, PLA+ filament, sandpaper, automotive primer | Advanced makers prioritizing 1:1 screen-accurate geometry |
| 4. Ready-Made Commercial Suits | $60 – $200+ / Instant | Off-the-shelf costume set (Spirit, CosSuits), boots, cape | Casual fans, fast styling & last-minute premiere events |
1. Cardboard & Pepakura Entry Builds (Under $50) — Core Features, Pros & Cons, and Target Audience
-
Core Features: Represents the foundational rung of the Doctor Doom cosplay budget ladder. Makers use printable 2D Pepakura paper templates or trace cereal-box cardboard panels to construct Latverian mask contours and chest armor.
-
Pros & Cons: Ultra-low material cost ($15–$50) and accessible using basic household tools; susceptible to moisture damage, creasing, and limited durability during long convention walks.
-
Target Audience: First-time cosplayers, student makers, and fans needing a last-minute outfit for midnight screenings when analyzing cardboard vs EVA foam cosplay armor choices.
2. EVA Foam Intermediate Fabrication ($50–$150) — Core Features, Pros & Cons, and Target Audience
-
Core Features: Uses high-density Doctor Doom EVA foam armor sheets (4mm to 10mm thickness). Builders bevel edges using rotary dremel tools, heat-shape knee and chest plates over spherical forms, and bond seams with contact cement.
-
Pros & Cons: Delivers an exceptional strength-to-weight ratio, high flexibility, and realistic metallic finishes when sealed properly; requires investment in a heat gun, ventilation respirator, and specialty sealants.
-
Target Audience: Intermediate prop makers who want a lightweight, durable armor suit capable of surviving long days on convention floors.
3. High-Precision 3D Printed Armor ($150–$400+) — Core Features, Pros & Cons, and Target Audience
-
Core Features: Uses digital 3D models (STL files) sliced into multi-part prints for FDM or resin printers. Learning how to 3D print Doctor Doom cosplay armor allows makers to create exact geometric rivets, sharp facial angles, and articulated gauntlet fingers.
-
Pros & Cons: Yields uncompromised screen-accurate detail and structural rigidity; requires extensive post-processing (sanding, filler primer, micro-filling) and extended print times (100+ machine hours).
-
Target Audience: Experienced prop engineers and replica collectors pursuing competition-grade 3D printed Doctor Doom armor.
How to Choose Your Ideal Doctor Doom Build Strategy?
-
Assess Your Timeline & Budget: Weighing a DIY vs ready made Doctor Doom costume comes down to available workshop hours. If your event is days away, purchasing a ready made Doctor Doom costume or completing a quick cardboard mask build saves time. If you have months before a major convention, investment in foam or 3D printing yields higher visual authority.
-
Consider Wearability and Transport: Heavy 3D-printed plastic armor plates can be rigid during seated film screenings. If attending midnight premieres, opt for flexible EVA foam or soft fabric-based commercial suits.
-
Explore Workshop Sourcing: Complete your build by browsing our specialized collection of Doctor Doom cosplay armor kit and costume accessories!
Conclusion
The villain fabrication pipeline guarantees that fans of every budget tier can step into the armored shoes of Victor von Doom. From accessible weekend cardboard projects and flexible EVA foam armor builds to ultra-detailed 3D-printed replicas and ready-to-wear commercial sets, choosing the right tier on the budget ladder ensures a rewarding cosplay experience. Prepare your workshop today with our high-grade Doctor Doom cosplay armor kit and costume accessories!



Hinterlasse einen Kommentar
Diese Website ist durch hCaptcha geschützt und es gelten die allgemeinen Geschäftsbedingungen und Datenschutzbestimmungen von hCaptcha.