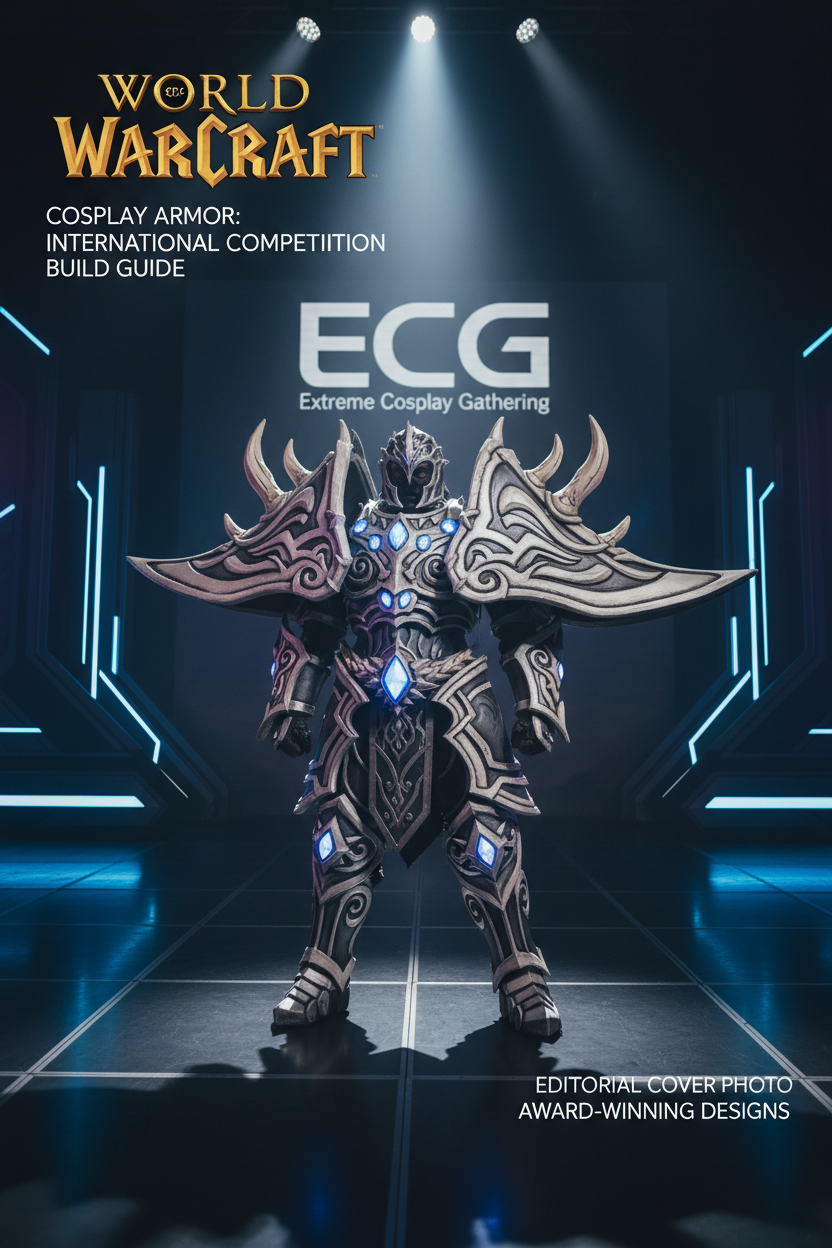
Building high-tier World of Warcraft cosplay armor requires mastering exaggerated silhouettes, oversized pauldrons, and weathered fantasy textures. Whether aiming for the stage at events like the Extreme Cosplay Gathering (ECG) or crafting a personal showcase, constructing classic MMO armor cosplay builds requires balancing visual impact with structural integrity.
This step-by-step guide walks you through transforming digital character models into wearable, award-winning fantasy MMO cosplay builds.
Prerequisites & Material Checklist
Before starting your World of Warcraft armor cosplay build, gather these essential workshop materials:
                  [ WoW FANTASY ARMOR WORKSHOP SETUP ]
                                   │
    ┌──────────────────────────────┼──────────────────────────────┐
    ▼                              ▼                              ▼
Structural Base              Detailing & Trims             Surface Finishing
- High-Density EVA Foam      - Clay Foam (Organic horns)   - Dremel Rotary Tool
  (6mm, 10mm, & 12mm)        - Thermoplastics (Worbla)     - Flex Paint / Plasti Dip
- PVC Pipe / Aluminum Rods   - Translucent Resin           - Metallic Acrylic Paint
  (Internal skeletal framing)  (Illuminated gems & runes)  - Weathering Glaze (Raw Umber)
Step 1: Extract and Scale the Fantasy Silhouette
The defining characteristic of epic fantasy armor cosplay—especially for races like Orcs, Night Elves, or Tauren—is exaggerated, heroic proportions.
                  [ SILHOUETTE SCALING WORKFLOW ]
                                 │
 ┌───────────────────────────────┴───────────────────────────────┐
 ▼                                                               ▼
1. Digital Model Extraction                                2. Paper Mockup & Ergonomics
- Extract 3D mesh via model viewer                        - Print 1:1 paper blueprints
- Isolate shoulder pauldrons & chest                       - Test arm mobility & door clearance
-
Extract the 3D Mesh: Use a model viewer to export your character's race and armor set (e.g., Judgement, Tier 3 Dreadnaught, or Lich King armor).
-
Scale to Real-World Ergonomics: Scale shoulder pauldrons to be 1.5x to 2x wider than your natural shoulders, ensuring internal clearance for your head to turn freely.
-
Draft Paper Patterns: Transfer the scaled vector lines onto paper and assemble a mock-up using masking tape to verify the silhouette before cutting foam.
Step 2: Construct Skeletal Support for Oversized Pauldrons and Weapons
Heavy fantasy armor cosplay pieces will sag or strain your body without proper weight distribution.
-
Build an Internal Harness: Craft an under-chest harness out of 5mm high-density EVA foam lined with heavy-duty webbing straps and quick-release buckles.
-
Anchor Pauldron Mounts: Insert 1/2-inch PVC piping or thermal-bent aluminum rods inside the shoulders to create rigid mounting pegs.
-
Weight Distribution: Anchor weapons and heavy cape trains to your natural waist using a reinforced weight-bearing belt rather than hanging them from your neck or shoulder seams.
Step 3: Layering Texture, Gemstones, and Runes
World of Warcraft cosplay stands apart from sci-fi armor (like Doomguy) or gothic builds (like Resident Evil 8) through its hand-carved, ornate, and stylized textures.
-
Bevel and Carve Trim Lines: Use a rotary tool (Dremel) with a sanding drum to bevel the edges of every trim layer at a 45-degree angle.
-
Sculpt Organic Elements: Use air-dry clay foam to sculpt bone spikes, horns, and filigree directly onto the EVA foam base, sealing them with contact cement.
-
Embed LED Gemstones: Cast clear resin gems tinted with alcohol inks. Hollow out the underlying EVA foam base, solder diffuse 5V LED strips inside, and seal with reflective foil behind the LEDs to maximize brightness on stage.
Step 4: Weathering and High-Contrast Paint Schemes
MMO armor requires high-contrast shading so intricate details do not wash out under intense competition spotlights or studio flash units.
                    [ 4-STAGE PAINTING WORKFLOW ]
                                   │
 ┌───────────────────┬─────────────┴─────────────┬───────────────────┐
 ▼                   ▼                           ▼                   ▼
1. Flex Rubber Base  2. Metallic Base Coat      3. Deep Shadow Wash 4. Edge Highlighting
- Plasti Dip sealing - Bright silver or bronze   - Black/brown acrylic - Dry-brush bright silver
  (Prevents cracking)  high-saturation coat        crevice glaze       along raised edges
-
Seal the Foam Base: Apply 3–4 light coats of flexible rubber primer (e.g., Plasti Dip or flex paint) to seal open foam pores.
-
Apply Base Metallics: Spray a dark steel or bronze base coat, followed by airbrushing vibrant character-specific hues (e.g., royal blues, deep purples, or fel greens).
-
Apply Shadow Washes: Slather a 50/50 mix of black/brown acrylic paint and water over the entire surface, wiping away the surface layer with a damp cloth so dark pigment remains in recessed crevices.
-
Dry-Brush Edge Highlights: Lightly flick a dry brush loaded with bright silver paint across raised edges, rivet heads, and battle scars to create maximum visual pop.
Troubleshooting Common Fantasy Armor Pitfalls
Problem 1: Pauldrons Shift or Flip Forward While Walking
-
Cause: Single-point shoulder attachment.
-
Solution: Implement a two-point rotational harness system using heavy-duty industrial Velcro and nylon straps attached to both the front chest plate and the back plate.
Problem 2: Paint Flakes Off at Foam Joints
-
Cause: Insufficient surface sealing or unconditioned foam expansion.
-
Solution: Heat-seal all EVA foam with a heat gun before applying flex primer. Always use flexible acrylic paints mixed with fabric medium for high-flex areas.
Problem 3: Giant Props Exceed Convention Weight Limits
-
Cause: Solid foam or resin construction without hollow cores.
-
Solution: Replace solid cores with hollow EVA foam skins wrapped around lightweight expandable spray-foam interiors reinforced with a central carbon fiber rod.
Next Steps for Building Award-Winning Armor
Building competitive World of Warcraft cosplay armor requires balancing bold fantasy proportions with practical workshop engineering. By focusing on skeletal support, layered textures, and high-contrast paint techniques, your build will command attention on any stage or convention floor.
Looking to build your next epic fantasy outfit? Check out our fantasy MMO armor cosplay kits for high-density foam bases, or pair your armor build with our oversized fantasy weapon props.
To see how fantasy armor compares to other heavy armor cosplay archetypes, read our companion guides on Sci-Fi Armor Fabrication Insights and Gothic Armor Detailing Techniques.

Hinterlasse einen Kommentar
Diese Website ist durch hCaptcha geschützt und es gelten die allgemeinen Geschäftsbedingungen und Datenschutzbestimmungen von hCaptcha.