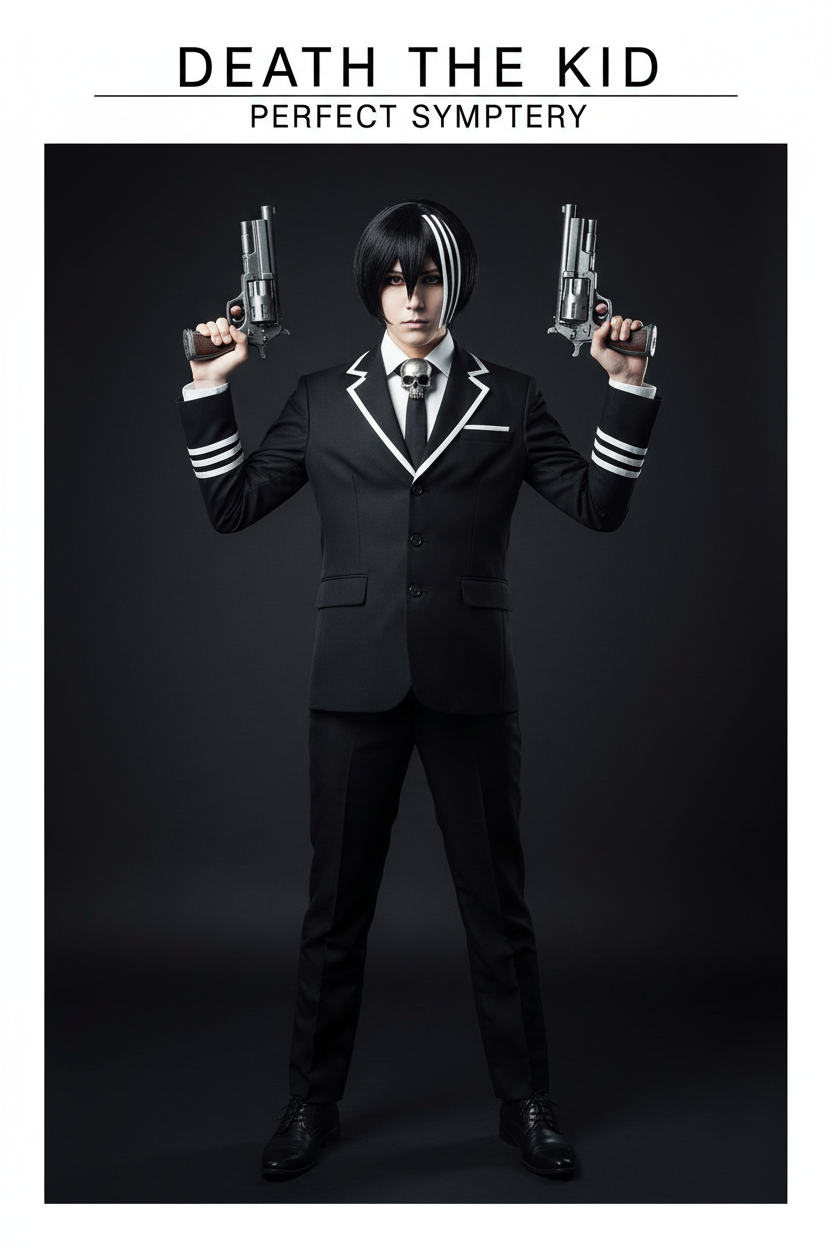
Death the Kid’s defining trait in Soul Eater—his neurotic obsession with absolute symmetry—makes him one of the most challenging precision tests in costume making. While classic anime cosplay trends often allow for minor tailoring variations, executing a Death the Kid cosplay leaves zero margin for error. Any uneven collar line, misaligned stripe, or crooked skull brooch immediately draws scrutiny from fans who know the character's signature gimmick.
                    [ SYMMETRICAL SUIT DRAFTING MATRIX ]
                                     │
     ┌───────────────────────────────┴───────────────────────────────┐
     ▼                                                               ▼
Left Panels & Trims                                              Right Panels & Trims
- Fold-cut technique for identical bias cuts                      - Fold-cut technique for identical bias cuts
- Laser-measured shoulder white stripes                          - Laser-measured shoulder white stripes
- Centered skull neckpiece alignment                             - Centered skull neckpiece alignment
Tutorial Goal & Preparation Checklist
Goal: Learn how to draft, tailor, and style a 1:1 mirrored Death the Kid costume that achieves strict bilateral balance across soft goods, wig styling, and dual weapon props.
Required Tools & Preparation Checklist:
-
Garment & Tailoring: High-density black suit fabric, white bias trim, rotary fabric cutter, grid mat, tailor's chalk, and precision-cut cosplay fabric & trim.
-
Wig Styling: Black short base wig, white fabric/acrylic paint, masking tape, fine-tooth comb, and classic anime cosplay wigs.
-
Accessories & Props: Matching skull ring pair, identical twin pistol props, center-line neck brooch, and full-length body mirror.
Step 1: Draft Symmetrical Garment Patterns and Collar Trims
The foundation of a convincing Soul Eater Death the Kid cosplay lies in crisp suit tailoring and mirrored trim placement.
-
Cut Panels Using Folded Fabric: Never cut the left and right jacket panels separately. Fold your black suit fabric in half and cut both sides simultaneously along a central crease to ensure identical lapel angles and sleeve lengths.
-
Apply White Shoulder Stripes with Grid Precision: Use a rotary cutter and acrylic grid ruler to cut six white shoulder stripes of exact equal width. Pin them using a laser level or center seam guide before stitching.

-
Align the Central Skull Brooch: Measure from the collar seams to the exact mathematical center of the chest. Mount the skull neckpiece onto a rigid center plate so it remains perfectly vertical when moving.

Step 2: Mirror the Hair Stripes and Wig Silhouette
Recreating Kid's iconic "Lines of Sanzu"—the three white stripes on the left side of his hair—presents a unique character paradox: his hair itself is inherently asymmetrical, driving the character mad, while the rest of his look must remain flawless.
+-----------------------------------------------------------------------+
|                    SANZU LINES WIG STYLING PROCESS                    |
+-----------------------------------------------------------------------+
| Step 1: Section out 3 crisp, parallel hair rows on the left side.     |
| Step 2: Mask off surrounding black fiber with painter's tape.          |
| Step 3: Apply opaque white fabric paint or acrylic ink evenly.        |
| Step 4: Heat-set and comb out to maintain natural fiber flow.          |
+-----------------------------------------------------------------------+
-
Section the Left Side Cleanly: Divide the left side of your wig into three razor-sharp horizontal bands using a fine-tooth comb and setting spray.
-
Mask Surrounding Black Fibers: Cover the rest of the wig with low-tack painter's tape to prevent white pigment overspray.
-
Paint with High-Opacity Acrylics: Apply white acrylic paint or specialized fabric dye in thin, even coats to create opaque, solid lines without clumping the wig fibers.
Step 3: Calibrate Accessories, Skull Rings, and Dual-Pistol Poses
A complete Death the Kid cosplay costume requires total consistency across handheld props and posing mechanics.
-
Equip Identical Twin Accessories: Wear matching skull rings on both middle fingers, ensuring the skull faces point outward at identical angles.
-
Use Identical Prop Pistols: Source 3D-printed or cast resin replicas of Liz and Patty in gun form. Ensure paint finish, weathering, and barrel lengths match down to the millimeter.
-
Practice Balanced Stances: Stand in front of a mirror with feet placed shoulder-width apart, holding both weapons upside down in Kid's signature pinky-trigger grip at equal elevation.
Troubleshooting & Symmetry Pitfalls Guide
| Pitfall / Issue | Root Cause | Prevention & Fix |
| Uneven Lapel Flaps | Stretching fabric during sewing | Interface both lapels with heavy fusible buckram before attaching trims. |
| Wig Stripes Bleeding | Liquid paint seeping under tape | Use high-viscosity cream paint or alcohol markers instead of watery paints. |
| Misaligned Shoulder Trims | Body posture shifting during fitting | Pin trims while wearing the jacket over a rigid, centered dress form. |
| Crooked Skull Brooch | Fabric sagging under brooch weight | Fasten a hidden plastic backing plate inside the collar to hold the pin straight. |
Summary & Next Steps in Symmetrical Character Design
Mastering a Death the Kid symmetry cosplay transforms a simple black suit into an impressive demonstration of precision crafting. By using grid drafting tools, mirrored trim placement, and disciplined posing, you bring one of anime's most memorable personality traits to life.
Related Evergreen & Character Styling Guides
-
Fate Series Cosplay Guide – Discover how classic anime character builds maintain long-term audience engagement.
-
Color Archetype Character Selection Matrix – Learn how high-contrast black-and-white palettes create immediate visual impact on camera.
![Face-Outward Cosplay Ultimate Guide: Mastering Camera-Ready Look Priorities [2026 Edition]](http://www.cosplayreal.com/cdn/shop/articles/cover-face-outward-cosplay-camera-ready-2026.png?v=1788028154&width=832)

Leave a comment
This site is protected by hCaptcha and the hCaptcha Privacy Policy and Terms of Service apply.